Estimated reading time: 3 minutes, 55 seconds

I got a concerned call the other day from an old friend about a dryer problem. The first indication of the problem was prolonged drying times.
There was the suspicion that when the new roof was installed that the roofer had neglected to reattach a vent to the outside and just had covered up the exhaust. (Roofers always get the blame). These build ups happen slowly and could cause an owner to suspect the dryer is at fault.
Upon inspecting the place where the exhaust vent entered the wall lots of moist lint existed and that had everyone concerned and rightfully so. The homeowner had already used a shop vacuum to get as much of the clog out as she could.
I said, “If I could get your dryer working again… would that be great?” As Grandpa Ben used to say, “I have a hunch what’s wrong.”
Here is how I went about solving the problem
First, I went up into the attic and verified that there was indeed a vent that left the house. Then I took a good look at the roof and counted roof vents and noticed that there was a vent cover right where it should be.
On the roof top

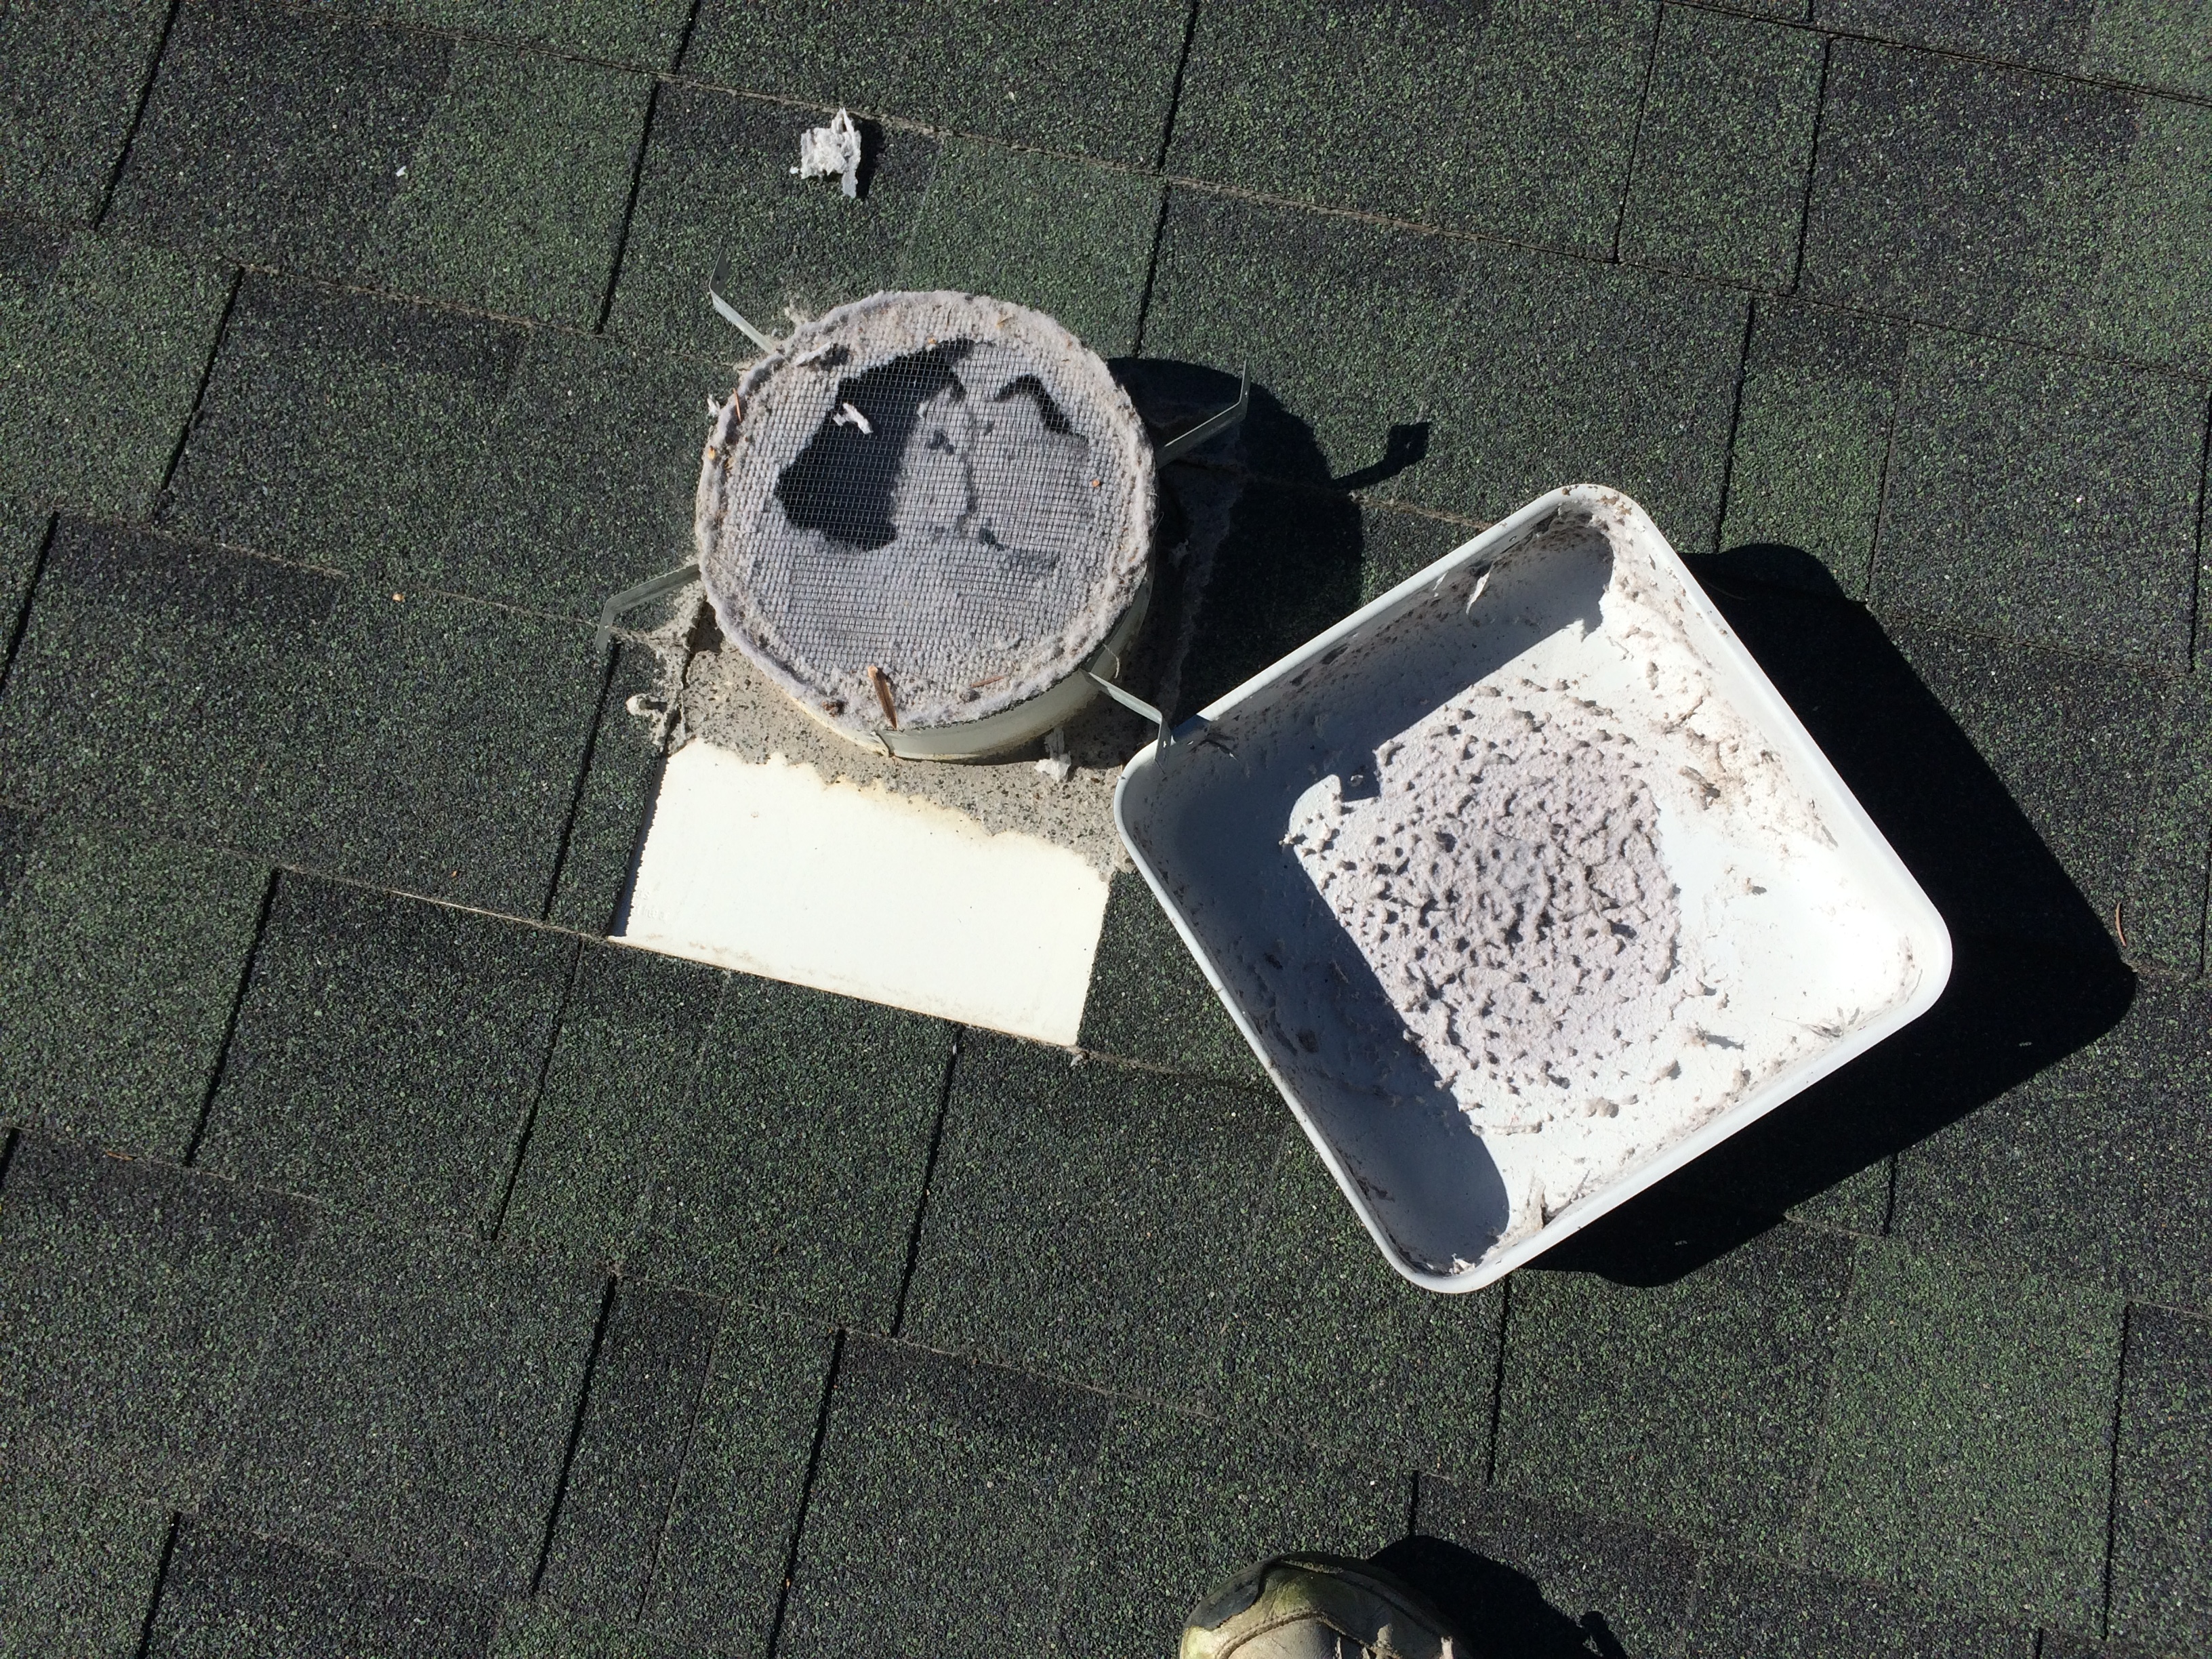
Next I went up on the roof and had her turn on the dryer. Sure enough, only a faint whisper of air was escaping. Fortunately, this vent is the type that could be disassembled so I took it apart. (If there had not been screws I would still have gotten in, even if I needed to drill out pop rivets.)
“Here’s your problem!” (a favorite line of mine) I exclaimed when I located the source of the obstruction.
It turns out that many roof vents are designed to keep pests out of the ductwork. Having a fine screen is a plus for that situation but a clogging issue when dryer vent lint is involved.
Once I removed the screen, the air pressure of the dryer was strong enough to help get a bunch of lint out. There was still lots of buildup from prolonged exposure to the lint and it had been rusting the pipes. A quick inspection with a flashlight revealed an ugly situation.
Next was the clean out process. I ran off and got my special duct-cleaning tool and blew it all out. It was a big mess to say the least.
I later realized, not only did I eliminate a clogged dryer vent but in turn saved energy, and reduced a fire hazard. (Lint is used in survival situations as a great fire starter.)

This is the tool I use for cleaning dryer ducts but there are many types on the market. Mine works with compressed air, I control it with a lever that when depressed encourages the head to race down the duct. The aluminum ball has holes in it that are board backwards that bring the lint up and out as I retract the hose.
Preventative maintenance
This is just one more preventative maintenance duty that needs to be added to a calendar. It is anyone’s guess how often the duct needs cleaning, Now that the obstruction has been cleared that the natural convection of hot air will lift the lint out of the home.
It is anyone’s guess as to how often your dryer vent duct should be cleaned; quarterly inspection will get a handle on it quickly.
Bonus Round Questions?
- Who can tell me how often they clean their dryer vent?
- Who uses a different tool and is in love with it?
Another duct that can often use cleaning is the bathroom fan. I have been using co2 for that job, I created a hose with a metal tip so that I can direct a blast towards the duct as the fan is on. It too creates a bit of a mess but the ducts are far cleaner and operate better after the brief treatment.
Yes, duct cleaning in general provides some comedy relief when the shower of lint emerges, but it gets the job done. I do these things during non-Levco time to be sure it doesn’t interfere with the Remodeling business. Repairing things and understanding homes is just another passion of mine.
Your comments are welcome. To ask questions or get more information about remodeling, click here to email me directly, or call 208-947-7261
If you or someone you know is considering remodeling or just wants to speak to a trustworthy remodeling contractor please contact me, you’ll be glad you did.


Leave a Reply